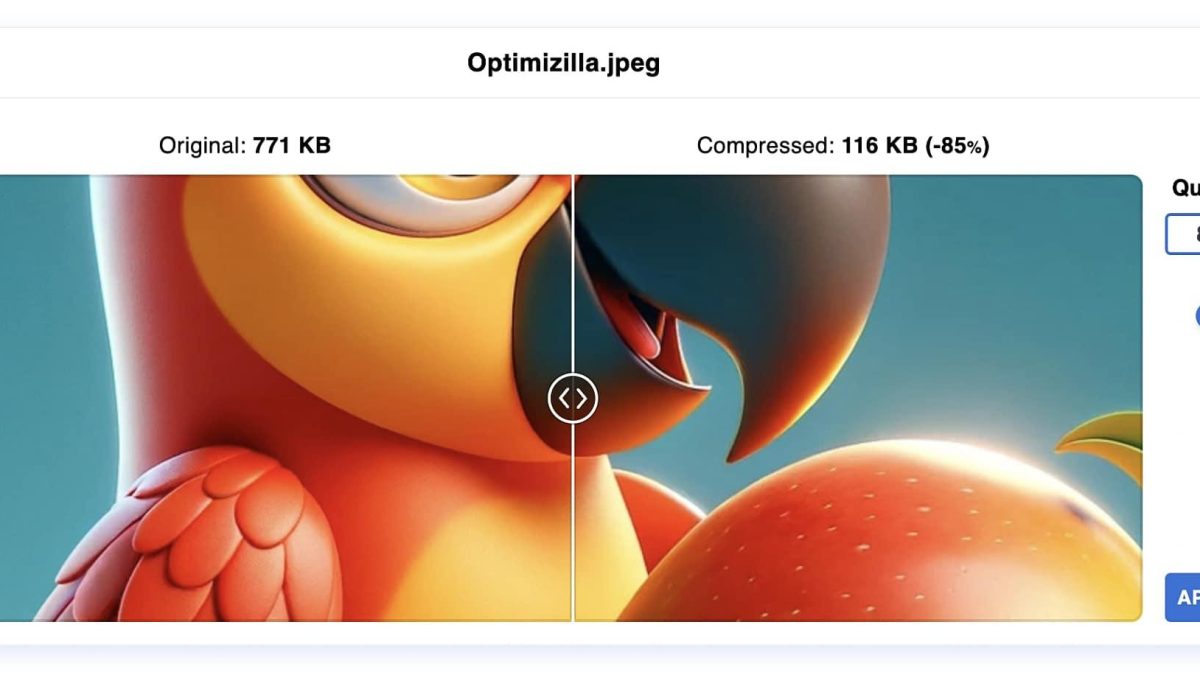
A photo from a modern smartphone can easily be 5 to 8 megabytes. That same photo, properly compressed, can be brought down to 200 or 300 kilobytes with absolutely no visible difference on a screen. That is a reduction of 95 percent while keeping the image looking identical to the human eye.
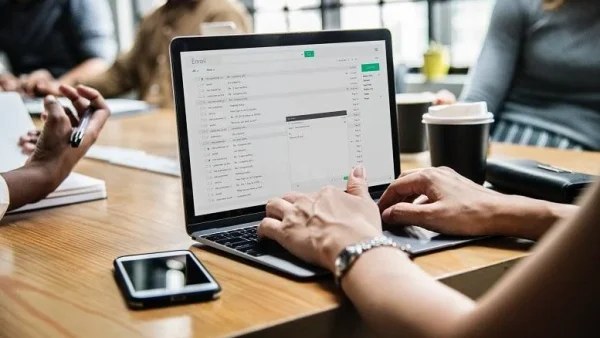
This matters more than most people realize. Large images slow down websites significantly, make emails bounce back over attachment size limits, and cause upload failures on platforms with strict file size caps. Knowing how to compress an image properly is one of those simple practical skills that solves real problems.
This post covers the best free tools for doing it, how to use them, and how to know when you have compressed enough without going too far.
Why Images Have Large File Sizes
A digital image stores color information for every single pixel. A photograph that is 4000 pixels wide and 3000 pixels tall contains 12 million individual color values. Storing each of those at full precision produces an enormous file.
Image formats like JPEG exist to reduce that file size by taking advantage of how human vision actually works. Our eyes are more sensitive to changes in brightness than to changes in color, and we are not very good at detecting small differences in areas of similar color. JPEG compression uses these perceptual limitations to discard data we would not notice anyway, which is why a well-compressed JPEG can look indistinguishable from the original despite being a fraction of the size.
PNG works differently. Rather than discarding anything, it finds patterns and repetition in the data and stores them more efficiently. The original can be perfectly reconstructed. This makes PNG ideal for images with large flat areas of solid color, like logos and illustrations, but less efficient for complex photographs.
Understanding this explains why the same compression tool produces very different results on different images. A photograph might compress by 80 percent. A simple screenshot with flat colors might only compress by 15 percent. Both outcomes are correct. The tools are not broken. It just depends on what is in the image.
The Difference Between Lossless and Lossy Compression
These two terms come up when you use compression tools, and understanding them prevents mistakes.
Lossless compression reduces file size without throwing away any image data. The result looks identical to the original because it is identical. The trade-off is that the size reduction is more modest. For PNG files in particular, lossless compression can still produce surprisingly significant size reductions because PNG files often have a lot of redundant data that smarter encoding can remove.
Lossy compression discards some image data to achieve larger file size reductions. Done well, at moderate settings, the discarded data is precisely the information your eyes would not have noticed anyway. The image looks the same. Done aggressively, it introduces visible artifacts, particularly blocky patterns and smearing around edges.
For most practical purposes, lossy compression at a quality level of 75 to 85 percent is the sweet spot. Files are dramatically smaller and the images look identical in normal use.
The Best Free Online Image Compressors
Squoosh by Google
Squoosh is the most powerful free image compression tool available, and what makes it unique is where the processing happens. Your images are never uploaded to any server. Everything happens inside your web browser on your own device. This is a meaningful privacy advantage if you are compressing images of people, documents, or anything you would rather not send to a third-party server.
The interface shows you the original and compressed versions side by side in real time. You can drag a divider left and right to compare them directly, and you see the file size of each version. As you move the quality slider, both the visual result and the file size update instantly. This lets you find the exact point where quality is still acceptable and file size is as small as possible, for each specific image individually.
Squoosh supports JPEG, PNG, WebP, and AVIF formats. WebP in particular is worth using for website images because it consistently produces smaller files than JPEG at the same visual quality. AVIF goes even further and is worth considering if your audience uses modern devices.
The one limitation is that Squoosh handles one image at a time. It is not designed for batch processing.
TinyPNG
TinyPNG is one of the most widely used image compression tools on the internet, and it earns that popularity. Despite the name, it compresses both PNG and JPEG files. You can upload up to 20 images at once and it processes them all simultaneously, which makes it significantly faster than single-file tools when you have a batch to work through.
The compression algorithm is particularly well-suited to PNG files. It analyzes the color data in the image and intelligently reduces the number of distinct colors used in ways the eye does not detect, which can shrink PNG files dramatically without any visible change. For logos, icons, illustrations, and screenshots, TinyPNG often achieves reductions of 60 to 80 percent while the images look identical.
Files are processed on TinyPNG’s servers and then deleted after a short period. The free tier handles files up to 5 megabytes each, which covers most everyday images.
Compressor.io
Compressor.io handles four formats: JPEG, PNG, GIF, and SVG. For each one, you can choose between lossy and lossless compression. The ability to make that choice explicitly for each file is a useful feature that many tools skip over.
The lossy mode on JPEG files is particularly effective. It consistently achieves strong reductions while maintaining good visual quality. The end-of-process view shows you the original and compressed file sizes side by side, along with a comparison of how the image looks.
One image at a time is the limit. Files must be under 10 megabytes. No sign-up required.
ImageOptim
ImageOptim is a free Mac application rather than a website. You download it once, and from that point forward you drag images onto the app window and it compresses them. Everything happens locally on your machine with no uploads and no internet connection required.
What makes ImageOptim worth mentioning alongside web-based tools is that it runs multiple compression algorithms on each image and keeps whichever result is smallest. It is thorough in a way that online tools, which need to be fast, sometimes are not. The results on PNG files in particular often outperform what web tools achieve.
Because it is a desktop application, there are no file size limits, no per-day or per-hour restrictions, and no privacy concerns about uploaded content. It is one of the few genuinely unlimited free options available.
The Question of Image Format
The format you choose affects file size as much as the compression settings. Knowing which format to use for which type of image is as important as knowing how to compress.
JPEG is the right choice for photographs and any image with complex color gradients. It compresses these efficiently and produces small files at good quality settings.
PNG is the right choice for logos, icons, illustrations, screenshots, and anything with a transparent background. PNG handles sharp edges and flat colors better than JPEG and maintains full transparency. PNG files tend to be larger than JPEG for photographic content, but tools like TinyPNG can reduce that substantially.
WebP is a modern format that outperforms both JPEG and PNG for web use. It produces smaller files than JPEG at equivalent quality and supports transparency like PNG. If you are preparing images for a website, converting to WebP is one of the most effective things you can do for load speed. Squoosh makes this conversion easy.
AVIF is even newer and more efficient than WebP. Support across browsers and devices is now solid for web use. For maximum compression with minimal quality loss, AVIF is the current state of the art.
Getting the Best Results
A few practices make a significant difference in how well compression works.
Always compress from the original high-resolution file. Never compress an already-compressed image. Each time you apply lossy compression, you lose quality from what is already a reduced version. The degradation compounds in a way that is hard to reverse. Keep originals archived and only compress to create output copies.
Resize the image to the actual dimensions it will be displayed at before compressing. A 4000-pixel-wide photograph being displayed at 800 pixels wide is carrying five times more data than it needs to. Resizing first eliminates that excess completely, independent of any compression. The size reduction from resizing appropriately often exceeds what compression alone can achieve.
Use the quality comparison feature whenever the tool offers it. Squoosh’s side-by-side comparison is particularly good for this. Find the quality setting where the image still looks excellent, then stop there rather than pushing for the smallest possible file at the cost of visible quality.
Frequently Asked Questions
What quality setting should I use for JPEG images?
75 to 85 percent is the standard recommendation for most content. Below 70 percent, compression artifacts become visible on closer inspection. Above 85 percent, the additional quality gain is marginal while the file size savings diminish. The specific sweet spot varies by image, which is why a tool with live preview like Squoosh is valuable.
Can I compress a PNG without any quality loss?
Yes. PNG compression is lossless by nature. Tools like TinyPNG and ImageOptim reduce PNG file sizes through more efficient encoding without discarding any image information. The compressed file looks identical to the original.
What happens if I compress the same image multiple times?
For lossy formats like JPEG, each compression cycle degrades quality slightly while providing diminishing file size returns. You should compress once from the original and keep the original archived separately. For lossless PNG compression, there is no quality degradation from multiple passes.
What is the best image format for a website?
WebP offers the best balance of quality, file size, and compatibility for modern websites. AVIF is more efficient but still gaining support. JPEG works for photos when WebP is not an option. PNG is best for graphics with transparency. Squoosh makes converting to WebP or AVIF straightforward.
Is there a limit to how small an image can be compressed?
Yes. There is a floor below which further compression either produces no additional size reduction or causes obvious visual degradation. For a typical photograph, somewhere around 50 to 150 kilobytes is usually the practical minimum before quality becomes noticeably poor.